
Breathing & training
Slayers 2 Wind Breathing: Saneri Location & Training Guide
Start Wind Breathing with Wind Trainer Saneri at level 25. Find him on an ice platform below the snow settlement, then complete Push ups, Boulder Split, Boulder Push, Aim Training, Meditate and the Wind Trainee fight in that order. Prepare for cold damage on both the trainer trip and the final encounter.
On this page
Wind Breathing requirements
Meet Saneri’s requests, accept Wind Breathing Training and check the first objective in your quest tracker.
| Requirement | Prepare before training |
|---|---|
| Character level | 25 |
| Trainer | Wind Trainer Saneri |
| Materials | 50 Demon Horns |
Prepare before entering the snow
Reach level 25 and set aside 50 Demon Horns for the trainer visit. Read Saneri’s request before handing items over. Bring healing supplies as well: getting to the trainer and surviving the final fight are separate parts of the trip.
The snow region causes cold damage. Use campfires as stopping points and recover before moving farther. A horse can shorten travel, but the route can also be followed on foot; a mount does not replace cold protection or healing.
Activate useful travel points along the approach. You will return to the warmer training areas for several exercises, then go back into the snow for the Wind Trainee. Recover before that return trip rather than arriving at the fight with a nearly empty health bar.
Find Wind Trainer Saneri
Saneri and the Wind Trainee are different NPCs. Finding the trainer begins the quest; defeating a nearby enemy does not replace accepting it. During the final stage, follow the active trainee objective rather than returning to Saneri’s platform.
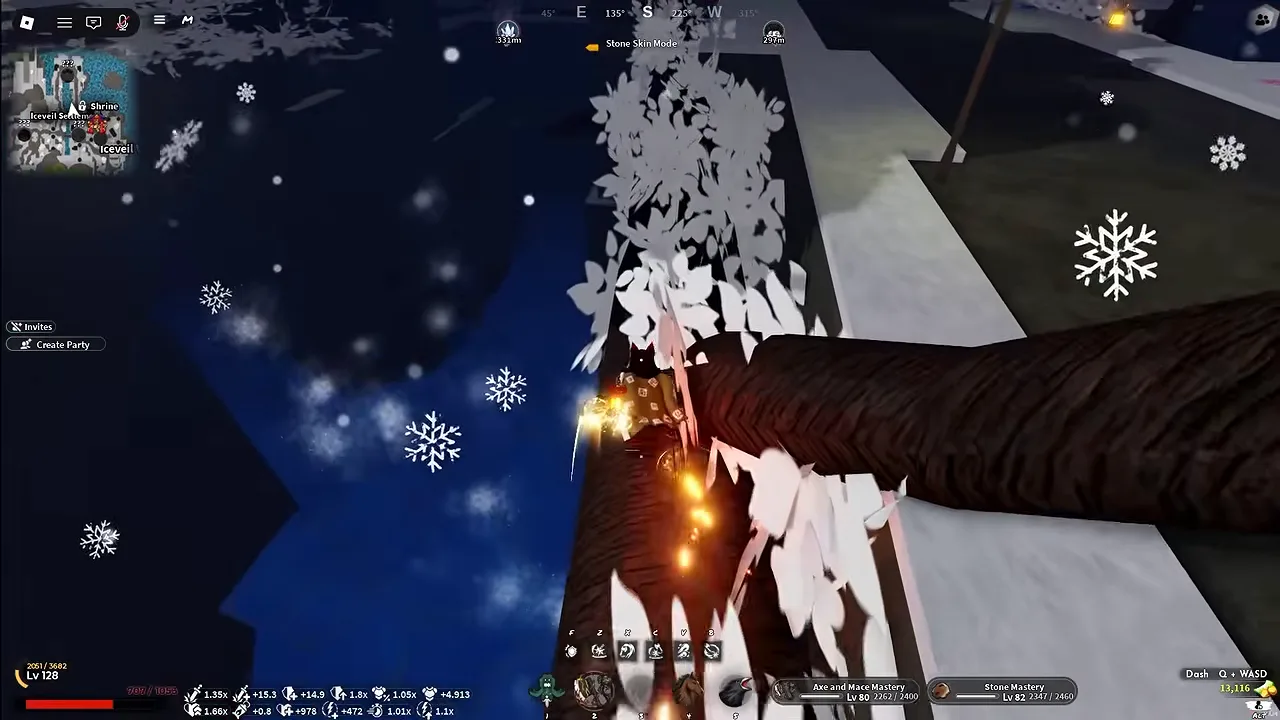
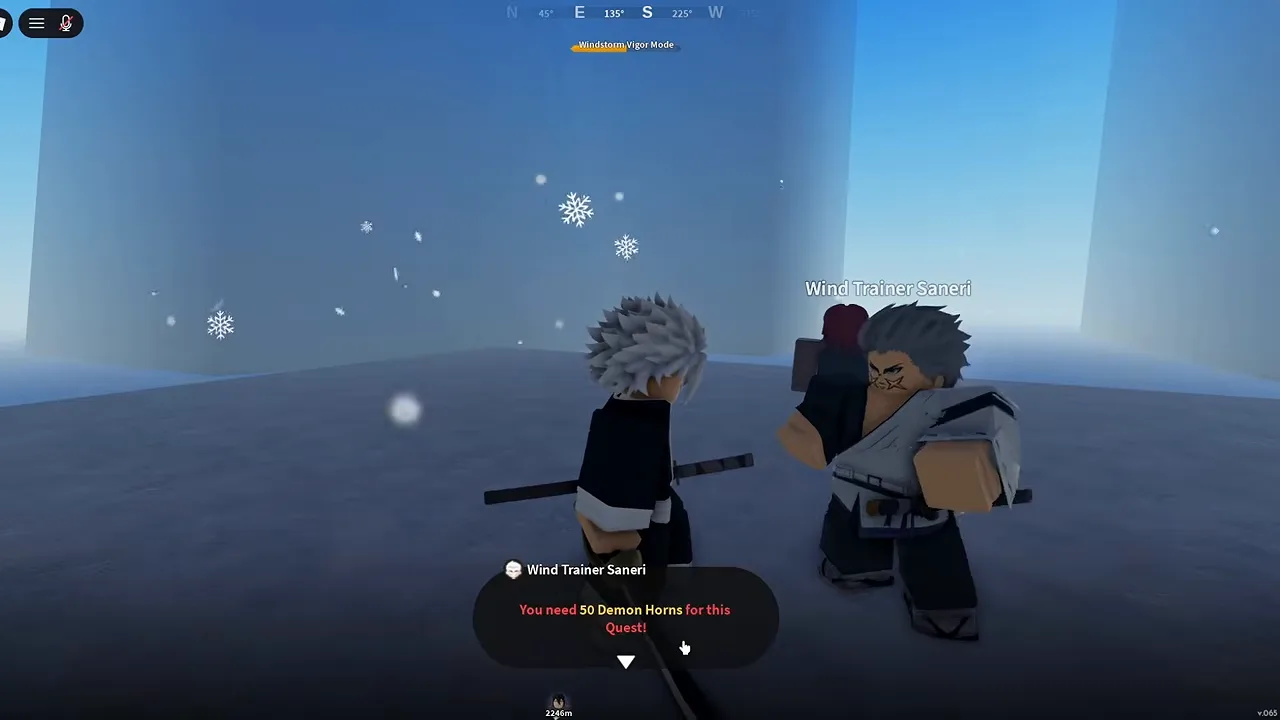
- Reach the shrine and red-gated settlement in Iceveil Valley. Recover before entering the cold; an unlocked shrine shortens repeat trips.
- Find the large fallen tree with pale leaves beside the shrine and follow its trunk toward the water.
- Swim to the broad flat platform below. Look for Wind Trainer Saneri’s Chat interaction.
- Bring fifty Demon Horns, accept Wind Breathing Training and follow its first Push ups objective back to the warmer training area.
Complete the six Wind training tasks in order
Complete these tasks in quest order. The next row unlocks after the previous one registers. If your tracker shows a different sequence, follow its named prerequisite.
After the trainee fight, open M → Skill Tree and select Wind. Training unlocks the branch; each move has its own points, mastery and prerequisite requirements.
Find the mats and align the indicator.
Boulder Split inputsUse the circle exercise, rather than attacking the rock.
Learn the next moveSeparate points, mastery and prerequisite nodes.
| Step | Objective | How to finish |
|---|---|---|
| 1 | Push ups | Use the Pushups mat in the training house; click when the shrinking inner ring meets the outer ring. |
| 2 | Boulder Split | At a rope-wrapped boulder, drag with the moving circles and survive the displayed countdown. |
| 3 | Boulder Push | Guide the boulder through the fenced maze to its destination before the timer expires. |
| 4 | Aim Training | Use the Target Shooting station outside the training house and click each appearing target. |
| 5 | Meditate | Use a dark meditation mat inside the red-floored Butterfly Estate training house. Time clicks to the moving indicator and yellow marker. |
| 6 | Wind Trainee | Defeat the quest-marked Wind Trainee after the earlier exercises; confirm the style unlock. |
Push ups and Boulder Split
Begin at the push-up station in Butterfly Estate. Start the training interaction and click when the moving circle reaches the outside ring. Check that Push ups is completed before travelling to the boulders.
Boulder Split is below Windy Peak. Follow its active marker to the rope-wrapped training rocks. Setting a convenient spawn point on the upper route can save climbing on a later return.
Start the exercise through the training interaction. Drag the on-screen control to follow the moving target and keep it aligned through the 30-second activity. Watch the remaining hearts; ordinary weapon attacks on the boulder will not complete this minigame.
Let the splitting scene finish, then check that Boulder Push becomes active. Splitting and pushing are separate objectives even though their stations are close together.
Get the boulder through the pushing course
Head behind the Boulder Split area to the Boulder Push station and begin the activity. Your goal is to move the boulder through the fenced course to the blue destination circle before the timer runs out.
Zoom the camera out so you can see turns before reaching them. Follow the open corridor between the fences. When the forward route is blocked, backtrack to the open left-hand turn rather than continuing to push into the barrier.
Keep the destination in view, but follow the corridor around obstacles instead of trying to reach it in a straight line. After the boulder reaches the end, check for Aim Training as the next objective. If you leave the activity early, check the quest row before travelling away.
Finish Aim Training and Meditate
Return to Butterfly Estate for the shooting targets. Start Target Shooting and click each target as it appears. Keep your cursor ready for the next target instead of repeatedly clicking a target that has already disappeared.
After Aim Training completes, stay in the estate area and follow the meditation marker. Start the activity and click as the moving indicator meets the white target line. Watch the progress meter and correct the timing of your next click after a miss.
You should now have five of six objectives completed. If the Wind Trainee row remains locked, inspect which exercise did not register. Returning to the trainer will not substitute for a missing exercise.
Defeat the Wind Trainee and confirm the unlock
Follow the newly active marker back into the snowy region. Use a travel point you have already unlocked when it shortens the trip, and stop at a campfire before approaching the arena if cold damage has reduced your health.
Fight using your current weapon and learned abilities: Wind Breathing is the reward for this encounter. Keep enough room to reposition, avoid starting an attack while recovering from a hit, and use short attack sequences that let you return to defence. Do not budget the fight around Wind moves you have not unlocked yet.
After defeating the trainee, check that the training quest completes and Wind Mastery appears. Open the skill tree with M on PC and inspect the Wind Breathing branch for individual skill requirements. Finishing the quest does not automatically make every move usable.
If the quest still shows five of six, confirm you fought the marked Wind Trainee. If Wind Mastery is present but a skill is locked, inspect that skill’s mastery and point requirements instead of repeating the exercise chain.
Start with Mountain Wind, then check Purifying Claws
After the Wind Trainee, open the Wind branch and begin with Mountain Wind. Use an equipped katana that supports breathing skills; if a move is unavailable while holding another weapon, check the weapon restriction before repeating the trainer quest.
Purifying Claws requires Wind Mastery 14 and six skill points. Reaching the mastery threshold alone is not enough if you have already spent the points elsewhere. Select the node and check both requirements before planning it into your next fight.
Mountain Wind, Purifying Claws, Rising Dust Storm, Whirlwind Cutter and Idaten Typhoon are separate moves in the branch. Learn the inputs of the moves you have unlocked in a manageable encounter before committing to a harder boss. Keep the final skill’s node requirements separate from the six-task breathing unlock.
Two-part upward attack and combat-bar checks.
Purifying Claws: mastery and follow-upRead its Wind Mastery 14 gate and conditional second press.
Rising Dust Storm: distance variantsCompare the traveling and close-range cyclones.
Whirlwind Cutter: tap and holdChoose between its short two-hit attack and sustained spin.
Idaten Typhoon: distance variantsCompare its three long-range slashes with the close-range launch.
Continue your journey
Find more guides in the Slayers 2 Wiki & Database.