
Demon progression
How to Unlock a Blood Demon Art
Learn a Blood Demon Art in Slayers 2 (formerly Project Slayers 2) by becoming a Demon, getting the art’s Orb from Muzan’s power roll or chest loot, and using it to start its Core Training quest. Each art has its own exercise order. Finish its active objectives, then open the art branch in Skill Tree to unlock moves. Muzan is the power-roll NPC; the training is completed at exercise stations and quest targets.
On this page
Prepare for training
Complete Muzan’s conversion quest and use Muzan’s Blood before beginning the Demon training route. Keep the Biwa Bell: it lets you return to Muzan’s domain for his power dialogue.
Prepare recovery supplies and sun protection before a daytime trip. The training objectives can take you away from the place where you used the orb.
Muzan location and the Biwa Bell route
For the first invitation, search Mistfall Harbor, Hidden Mist Village and Iceveil Valley after dark. Muzan walks through the village areas, so check surrounding paths. Complete his conversion quest and use Muzan’s Blood before asking for an art.
If you are already a Demon with the Biwa Bell, equip and use the bell to enter Muzan’s lair. Speak to him on the petal-covered balcony and choose Give me your power. Give me a task opens hunt quests instead.
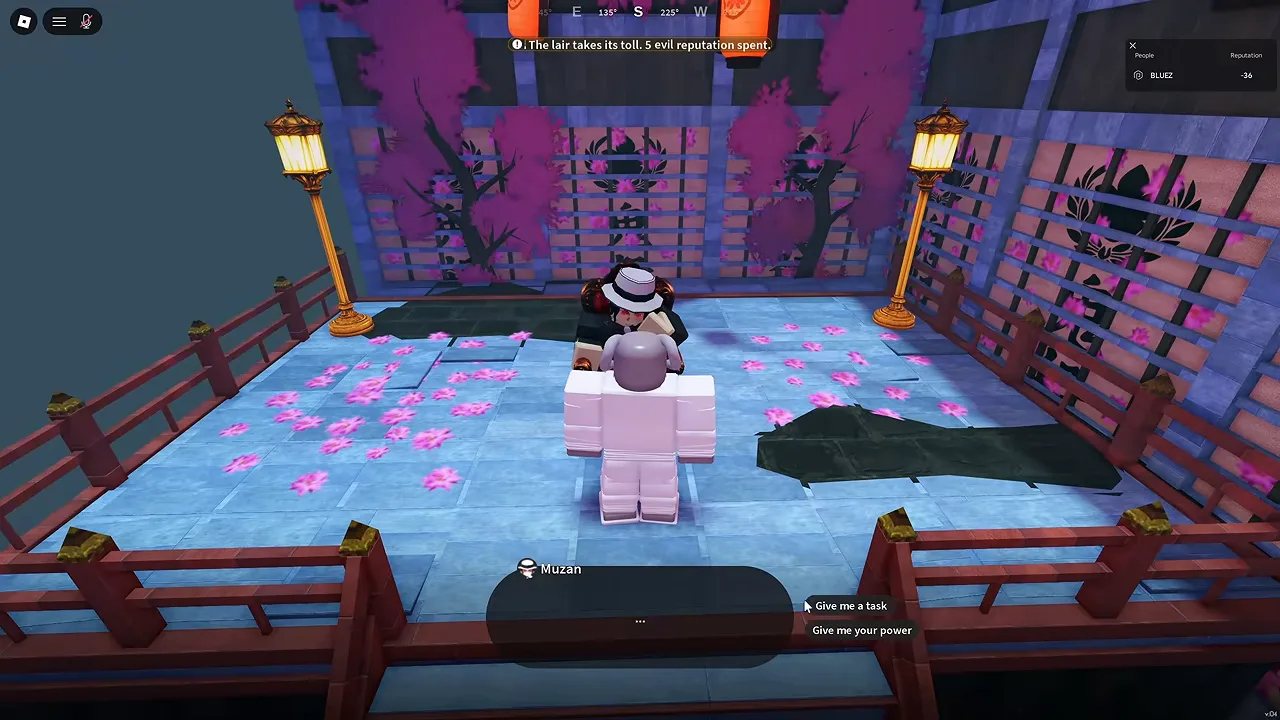
Find Muzan, use the Biwa Bell and complete his conversion objectives.
Biwa Bell item guideReturn to Muzan’s domain after receiving the bell.
- Equip the Biwa Bell and use its item action to enter the lair.
- Approach Muzan and select Give me your power.
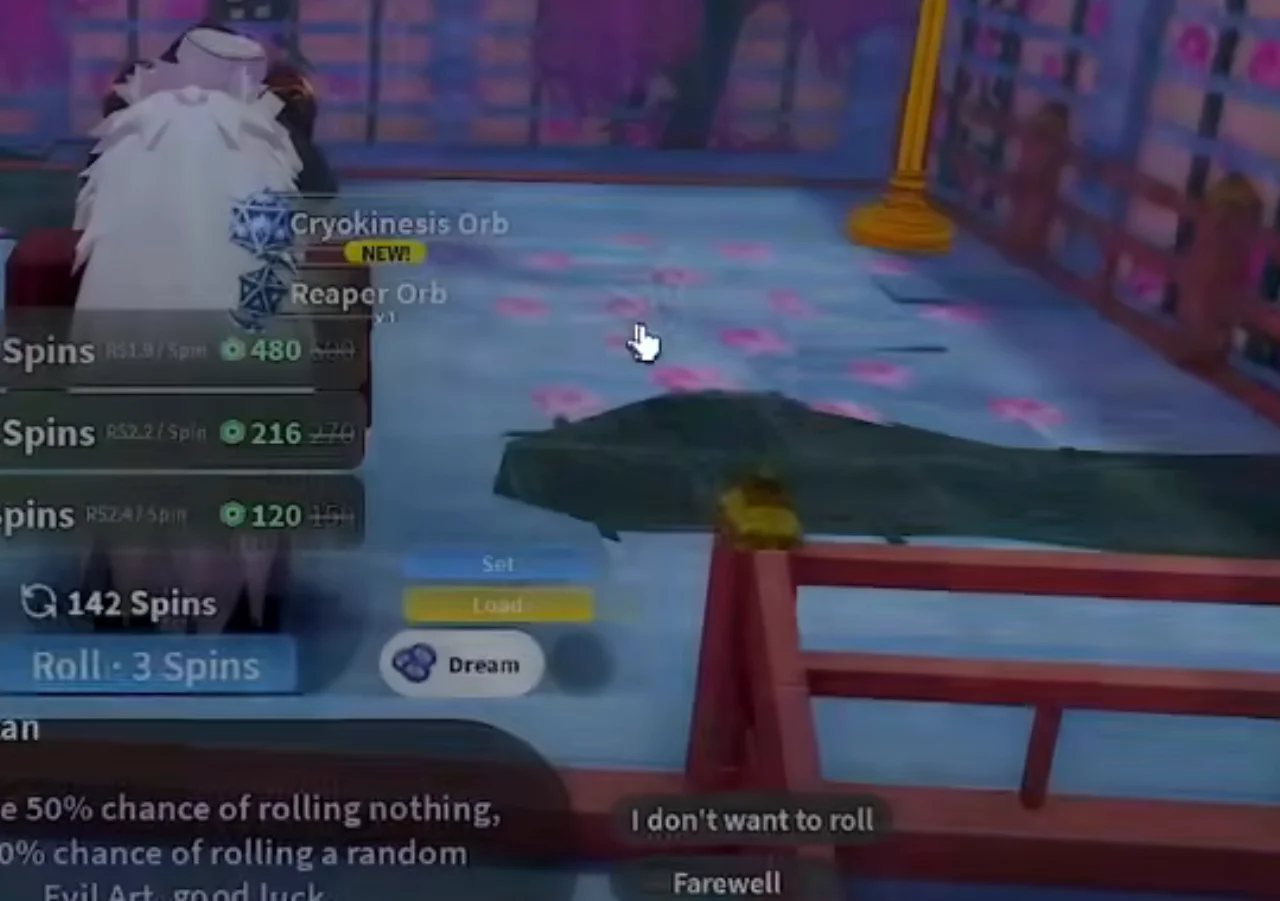
- Read the roll resource and result options before confirming; a roll can return no art.
- Check inventory for the Orb you want to train. A chest Orb can be used without making a Muzan roll.
- Equip and use the chosen Orb, then check its named Core Training quest.
Get the Orb through a Muzan roll or chest loot
A boss’s art skill scroll and an Evil Art Orb serve different purposes. An orb begins the art unlock route; a scroll concerns a particular move. Read the item name before using or selling it.
- For a roll, use the Biwa Bell and choose Muzan’s Give me your power dialogue.
- Inspect the required roll resource and confirm only after reading the panel.
- Check the resulting Orb in inventory and read the name and use prompt.
- For chest loot, open the defeated Boss’s chest and claim the Orb using its displayed interaction.
- Equip the desired Orb and start its training. Read any existing-art replacement prompt before removing an art you already use.
Use the orb and read Core Training
Select and use the art orb from your inventory or hotbar. Confirm that a named Core Training quest is shown and that its reward matches your chosen art. Follow the map markers and current objective order.
Locked objectives identify which earlier task must be finished first. The Obi Manipulation example below shows one complete sequence; use another art’s active quest as the checklist for that art.
Obi Manipulation Core Training example
The quest panel progresses through four objectives. Follow each marker and the exercise’s displayed controls, then check that the next objective has unlocked before travelling onward.
During combat, monitor the active counter. An unrelated enemy kill is not proof that the training objective advanced. Finish the final objective and confirm the Obi Manipulation unlock before opening its skill tree.
| Order | Objective | Completion check |
|---|---|---|
| 1 | Barbell squats | Complete the marked exercise: 1/1. |
| 2 | Boulder Push | Finish after the squats: 1/1. |
| 3 | Boulder Split | Complete after Boulder Push: 1/1. |
| 4 | Defeat Mizunotos | After Boulder Split, defeat the quest-marked Mizunotos until the displayed kill counter is complete. |
Unlock moves in the skill tree
Core Training and move-node unlocks are separate milestones. If a later skill remains locked, read its requirements instead of repeating the conversion quest.
Check the weapon requirement for the specific art and move before buying gear. A weapon that works with one Blood Demon Art is not a universal requirement for every Demon.
- Open the menu and select Skill Tree.
- Find the unlocked art’s branch. In this example, the tree identifies Character and Obi Manipulation.
- Inspect an available move node, its point cost and mastery requirement before unlocking it.
- Confirm the unlock message. Obi Barrage is one move available through the Obi branch.
- Use learned moves to build mastery, then return when you meet the next node’s requirements.
Ice Manipulation: practice the Cryokinesis moves
Ice Manipulation is the ice Blood Demon Art; its mastery display uses Cryokinesis. Once you have unlocked its moves, learn their individual activation conditions before adding weapon attacks. The Obi training checklist above is an Obi example, not an Ice quest checklist.
Use the move names in your equipped art and skill tree to identify controls. A key mentioned in a weapon combo can refer to a different move after switching equipment.
| Move | Activation to learn | What to watch |
|---|---|---|
| Wintry Icicles | Create the falling-icicle area, then press the skill again for the ground-spike eruption. | The second press is a separate action. Watch the target and the area instead of assuming the first activation completes both attacks. |
| Cold White Princesses | With a target in range, the stance leads into a teleport and ice restraint. Being struck during its activation window triggers its counter. | Counter timing matters: the stance is not a permanent defensive state. Practise the incoming-hit timing separately from the normal attack. |
| Freezing Cloud | At close range, it can grab a nearby opponent and slam them. At long range, releasing the key sends the ice-clone wave forward. | Choose your distance before activating. A distant target is a wave attempt, not the nearby grab. |
Practise each trigger before attempting a rotation
Treat these as individual drills, not a guaranteed chain. Landing an area attack does not by itself prove that the next grab will connect against a moving player. Add weapon follow-ups only after you can identify which attack hit and which one missed.
- Equip Cryokinesis and identify which of these moves you have actually learned. Leave locked moves out of your practice sequence.
- Start with Wintry Icicles alone. Activate the falling ice, press again, and distinguish the ground eruption from the first attack.
- Test Freezing Cloud close to a target and then from farther away. Learn the grab and release-to-wave inputs as two different situations.
- Practise Cold White Princesses with a partner: first use the normal in-range activation, then have the partner attack during the stance to learn the counter timing.
- Before repeating a move, check its cooldown and your resource bar. If the target escapes the opening attack, reposition before spending another skill.
When progression does not advance
For an orb, check acquisition, use, Core Training and move-node unlocks separately. For a Muzan roll, inspect the resulting art branch instead. Repeat only the unfinished part of your chosen route.
| What you see | Next check |
|---|---|
| No training quest after obtaining an orb | Select and use the art orb; check its exact name and active quest panel. |
| A training objective is locked | Finish the earlier objective named beneath it. |
| The art is unlocked but a move is unavailable | Read the skill node’s mastery and point requirements. |
| The training quest has disappeared | Inspect active quests and inventory before spending another orb. Do not reset the character as a training shortcut. |
| Sunlight interrupts travel | Equip suitable protection or travel at night. |
Every Blood Demon Art’s Core Training order
Choose the art you want to learn. Its quest sequence determines which activity opens next; the same stations serve several arts, with different prerequisites.
| Art / quest name | Training order |
|---|---|
| Ice Manipulation / Cryokinesis | Meditate → Boulder Split → Underwater Rocks → Defeat Mizunotos |
| Tamari | Cup Training → Push ups → Boulder Split → Defeat Mizunotos |
| Shockwave | Push ups → Barbell squats → Boulder Push → Boulder Split → Defeat Mizunotos |
| Dream Manipulation / Dream | Meditate → Cup Training → Aim Training → Defeat Mizunotos |
| Blood Manipulation | Cup Training → Push ups → Aim Training → Defeat Mizunotos |
| Pyrokinesis / Pyrokenesis | Push ups → Boulder Push → Aim Training → Defeat Mizunotos |
| Obi Manipulation | Barbell squats → Boulder Push → Boulder Split → Defeat Mizunotos |
| Arrow | Meditate → Aim Training → Boulder Push → Defeat Mizunotos |
| Reaper | Cup Training → Aim Training → Boulder Split → Defeat Mizunotos |
Where to complete each exercise
After the exercises, follow the active Defeat Mizunotos marker. Check the named target and quest counter; fighting a trainee Boss is a separate task.
When the final row completes, open the art branch in Skill Tree. The art unlock does not buy all move nodes.
| Exercise | Location | How to finish |
|---|---|---|
| Meditate | Butterfly Estate meditation mats | Use the dark mat in the training house. On PC, hold T at the prompt and time clicks to the moving indicator and yellow marker; finish the exercise and check the quest row. |
| Cup Training | Butterfly Estate cup station | Follow the cup carrying the ball through the shuffle and select it when the cups stop. Complete the activity before leaving the station. |
| Push ups | Butterfly Estate Pushups mat | Use the Pushups interaction on the dark mat and click as the shrinking ring meets the outer ring. Check the row completes before starting the next task. |
| Aim Training | Butterfly Estate Target Shooting station | Start Target Shooting and click each appearing target. Keep your cursor ready for the next target, then check the completed Aim Training row. |
| Barbell squats | Outdoor squat rack at the training area | Follow the Barbell squats marker to the rack. Keep the indicator inside the green zone until the activity completes. |
| Boulder Push | Fenced course near the Boulder Split station | Guide the boulder through the open lanes toward the blue destination. Zoom out at blocked turns to find the route around the fence. |
| Boulder Split | Rope-wrapped boulders below Windy Peak | Start Boulder Split Train, drag with the moving circles and survive the timer. The exercise uses the on-screen circles rather than weapon swings. |
| Underwater Rocks | Bamboo Grove Sanctuary pond | Collect five glowing Sea Crystals under the water. Surface between pickups for air and check Underwater Rocks reaches 5/5. |
| Defeat Mizunotos | Active Mizunoto quest marker; Mistfall Harbor route | Fight the Mizunoto Slayer enemies after the earlier exercises are complete. Check the named kill counter; a trainee boss is a different objective. |
Continue your journey
Find more guides in the Slayers 2 Wiki & Database.